So, here’s the thing….
I think that if you can refinish a chair, with all the details and hard to get at places, you can refinish anything. Chairs are a challenge – they are not a flat surface like a bureau, hutch, bedframe, desk or cabinet. They take patience and time. That's probably why I get asked to do so many! Getting them just right - from the various styles, repairing loose joints and lost spindles, painting, waxing and distressing all the rungs and corners - and then the seat - cane or cover.... patience. To refinish a chair and have it authentic, sturdy, beautiful and useable - I say, if you can handle a chair, you can accomplish great things with any piece you choose to refinish!
When
you are given the task of refinishing chairs of this nature – honestly, your greatest asset will be patience. You can’t be in a
hurry. Take your time, do a little and walk
away. Come back later with a fresh set
of eyes, review what you have done, fix any oversights (a missed nail hole, a
little more distressing, a little less wax) and you will be overjoyed with the
end result.
 |
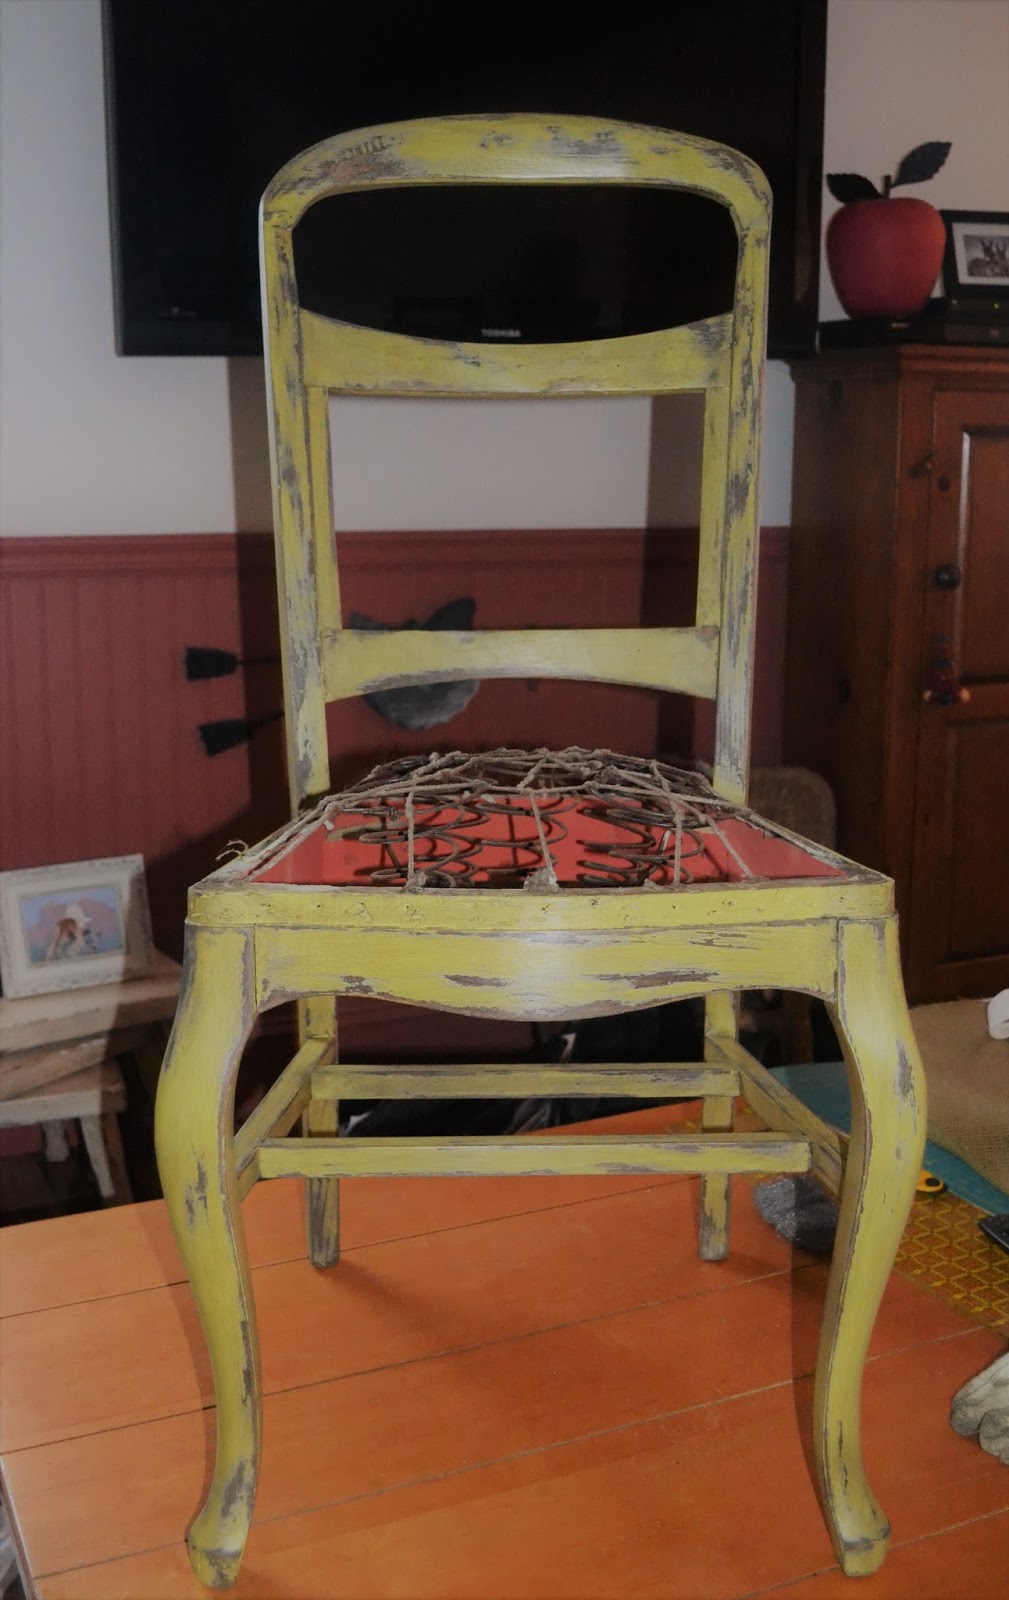
| BEFORE |
Let's Get Started!
Preparation
I
started by stripping off all of the fabric, old leather piping, horsehair batting,
burlap and then I removed so many nails I lost track – somewhere in the
hundreds.
Glue and Clamping
Next
came restoring the frames - gluing and clamping.
I use Gorilla Wood Glue found at my local Home Hardware Store. Gorilla Glue is awesome and, trust me, once your piece is complete - it will stand the test of time. When using glue of any type, be sure you have a damp rag when working with glue – once it is clamped the glue
will ooze out the crevices so a wet rag to wipe any drips away makes clean up easier.
Wood Filler
I used wood filler
on all the nail holes - yes, all of them - and again, let it dry – completely. I used a sanding block as to not remove the
patina of the wood or damage the edges.
Painting
A fresh coat of Annie Sloan "English Yellow" gave the chair life! English Yellow is a lovely happy color and in many ways, very much a neutral. These chairs, for example, are in a home full of blues, greens, wood tones and cream. They look spectacular!
Clear Wax and Distressing
A coat of clear wax to set the paint and act as a protection. To distress these particular chairs I used a medium steel wool as the wood was rough and my friend asked for a heavy distress. I let the wool do the work with an extra nudge here and there. This chairs must have been stored in a barn as the wood was well weathered as the paint came off easily and left a beautiful overall worn look.
Next, I practiced what I’ve preached. After I finished distressing this chair – I walked away and started on another project. The next day I came back and decided it needed a bit more distressing in a few places to make it authentic, worn and old. You will know after a few attempts if you have gone far enough. However, it is just as important to know when to stop!
Dark Wax
I
applied a coat of dark wax, followed by rubbing off the access with a clean
cotton rag. When I am working on chairs - painting or waxing, I turn it upside down and start on the bottom – and work
up. This allows you more control to flip, tilt and handle the chair without touching the places you have just worked on. Starting at the top makes it harder to maneuver.
Polishing
My go to polishing secret is cotton work gloves purchased at my local Hardware Store. An old diaper, dish towel or t-shirt works as well, however, I find the gloves allow me to feel the wood, polish rungs and spindles as opposed to a thick rag. I like to let the wax cure for a day or two and return once more to go over the chair with a fine steel wool. This removes any spots that are too heavy with wax – I find this around joints and spindles more so than other parts of the chair. The steel wool also allows me to remove wax from spots where I feel the paint would have worn off. One last buff and your chair is complete.
I
am a stickler for looking under a refinished chair or take a peak at the back
of dressers or sideboards – even in the drawers! I like to see a project finished completely. Why would you go to through the process of painting, sanding, distressing, waxing and polishing and not do everything? My furniture is always finished, top to bottom. Backs, drawers, bottoms - painted or stained.....always.
Upholstering
My friend asked that I use the wrong side of the fabric on the seat and back – she liked it better than the right side. A little creativity and we decided to use the right side of the fabric for the piping and the back panel on the back rest.
My friend asked that I use the wrong side of the fabric on the seat and back – she liked it better than the right side. A little creativity and we decided to use the right side of the fabric for the piping and the back panel on the back rest.
The
chair springs were covered in burlap and stapled in place, followed by a foam
form and a sheet of batting for comfort – again, stapled in place. Next came
the piping followed by the upholstery secured with antique brass nail heads.

On
the back panel I stapled upholstery tape followed by a foam form, a piece of
batting and then the piping. The fabric
was secured in place with antique brass nail heads.
I think this pair of destined for the dumpster chairs turned out great!


Please
let me know if you have any questions about this or any other project. I love
to share! Do you have a piece of furniture you don’t know what to do with? Send me a picture and I will provide a free
consultation for you!
“Supercalafragilisticexpialidocious!”
Until Next Time - Live Simply!
- Mary Elizabeth


