So,
here’s the thing….
I’ve had a few challenges with my little cottage over the last few years, so living in a small community, filled with wonderful people has been a
huge support. Someone is always
available to help with a leaky roof, a broken door handle, a disconnected
gutter or a fallen tree. One neighboring couple, in particular, has my
back…..always. Never asking anything in
return, refusing to be paid – just willing to help in a time of need.
So, when
the Mrs. of this lovely couple arrived at my doorstep with a chair (and
homemade cookies) rescued from the local Community Hall asking if there was any
way to save it – here was my chance to do something for them. We looked through paint colors and my stash
of fabric until she found what she felt would work with their home.
Let’s call a
spade a spade – this little baby had seen better days. But I love a challenge and a chance to learn
something new. When I find a piece of furniture to refinish I look for
uniqueness - character. Everything else can be fixed
– glued, turned, sanded, caned, reupholstered or built. I love finding a piece
that has bumps, dents and scratches – character. The little chair BEFORE:


What you will need for this project:
 |
| Wood filler, Paint, Stain, Putty knife & Brush |
 |
| Sanding Blocks |
 |
| Cotton Rags |
 |
| Upholstering Supplies |
The first step was to fill the gap on the back side of the chair where a strip of wood had broken away (you can see the gap in the BEFORE photo - top right hand side of the back of the chair....a big gap).
Using LePage Wood Filler and a putty knife I filled the gap and allowed it to dry completely. I used my trusty orbital sander and 220 grit paper to sand the wood filler down level with the original wood (you can use a sanding block if you don't own an orbital sander). I then changed to 400 grit paper and sanded to a smooth, level surface. The chair was now ready for paint.
PAINTING
Using LePage Wood Filler and a putty knife I filled the gap and allowed it to dry completely. I used my trusty orbital sander and 220 grit paper to sand the wood filler down level with the original wood (you can use a sanding block if you don't own an orbital sander). I then changed to 400 grit paper and sanded to a smooth, level surface. The chair was now ready for paint.
PAINTING
I painted this chair with two coats of Benjamin Moore, Colonial Brick - in eggshell latex, allowing each coat to dry completely and doing just a quick, light sand between coats.
After the chair had dried I used a 220 grit sanding block and distressed in places I thought would have been worn over the years. When you are distressing remember to sand the surfaces where backs and arms have rested, feet have landed and backsides have sat. If your goal is to create an old piece of furniture - expose the nail holes, deep scratches and dents. This gives your piece a more authentic look. It gives it character.
After I had the distressing finished I applied one coat of Minwax, Early American stain. I left that to sit for 30 minutes. I wanted the stain to set in the details and soak into all the wonderful exposed imperfections. Once it had dried I used a clean cotton rag to remove any excess stain and gave it a good polish.
UPHOLSTERING
To begin I used a piece of scrap brown paper and traced out the seat of the chair for my template. I used my scissors to cut the template down by 1/4" all the way around. Had I not cut it down, once the foam, batting and fabric were in place it would overhang on the seat - and I didn't want that!
I placed the brown paper template on a piece of ¾ inch plywood and traced it out. Using my jig saw, I followed the line and cut out the base for the chair. A quick pass with my sander to remove any rough edges or possibility of splinters and I was ready to upholster.
The next step was to cover the plywood base with foam and then
batting for a soft sit. These were attached using my staple gun making sure when the base was in place I would not see the staples from the underside of the chair - about 1/4".
The final step was to attach the prewashed, ironed fabric. I found a beautiful flower in the fabric that I wanted to placed in the middle of the seat. By eye, I lined it up and cut a circle leaving enough to gather and staple into place, over the batting staples on the underside. Ta-Da!
This once dumpster destined accent chair is now proudly living in my friend’s home –
and I was thrilled to save this little beauty.
Here's the little chair AFTER:
 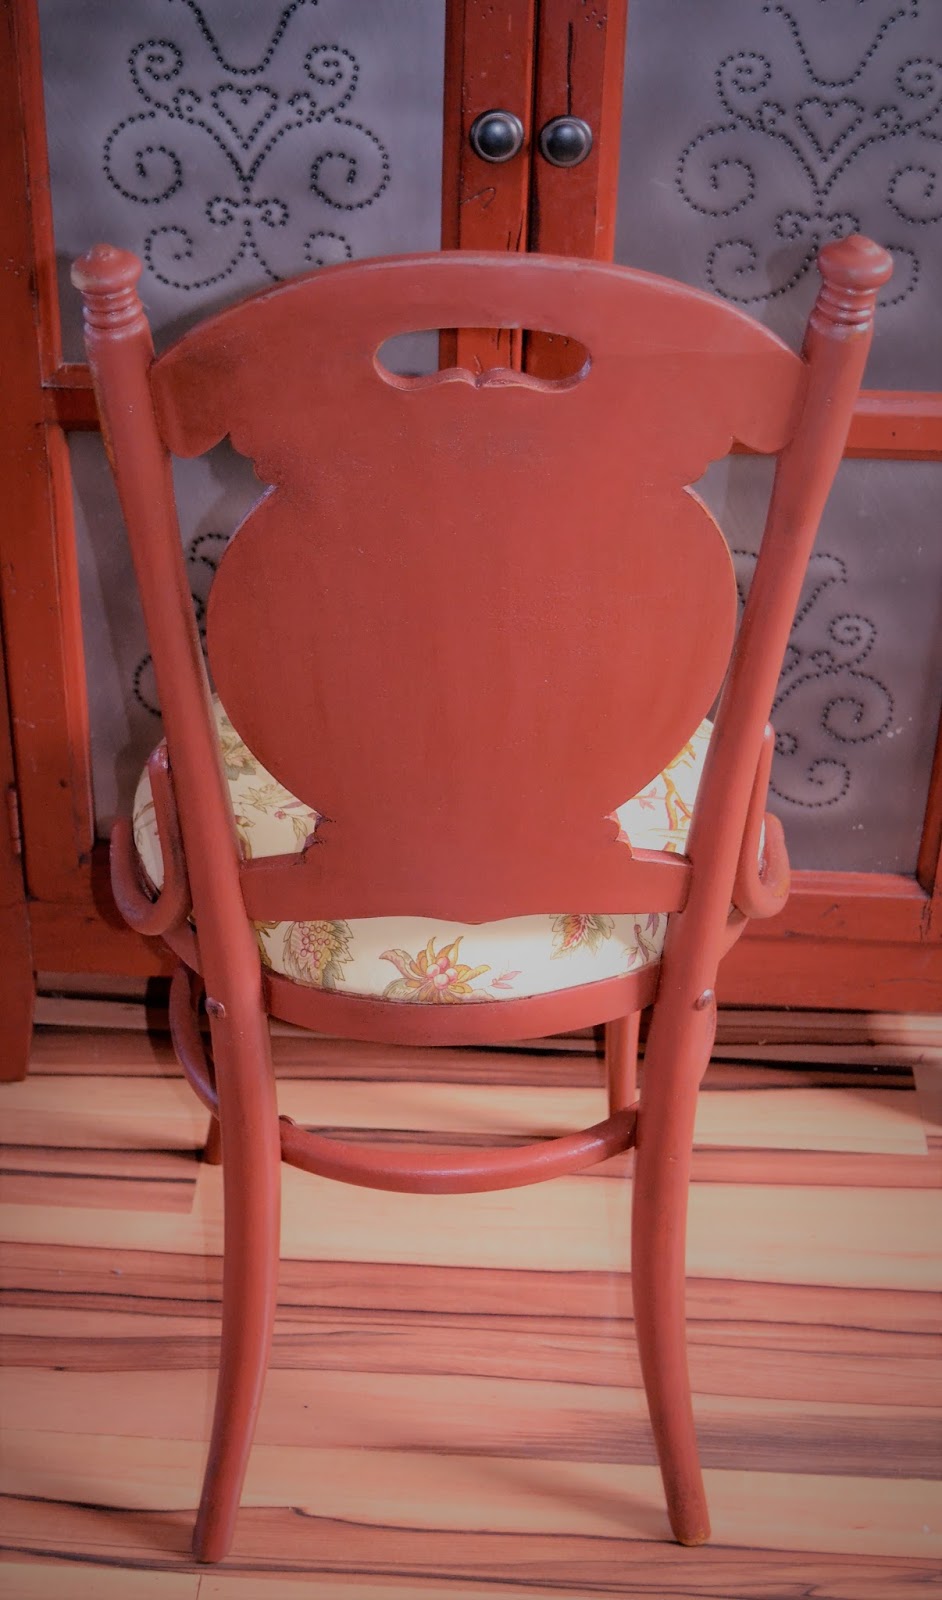 |
| The perfect little accent chair |
Tomorrow I'll share how I turned an sweater into a great pillow.
Do you have a piece of furniture you don’t know
what to do with or think is beyond repair? Send me a picture and I
will provide a free consultation for you!
“When we give freely and accept gratefully, everyone is blessed.”
“When we give freely and accept gratefully, everyone is blessed.”
-
Maya Angelou

Mary Elizabeth


